How To Look Like A Disney Princess: Snow White
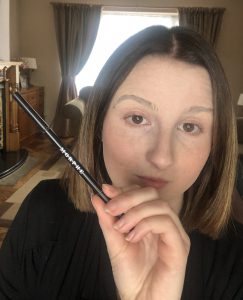
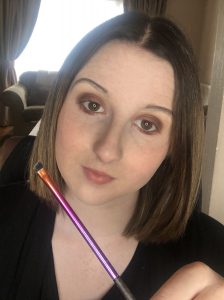
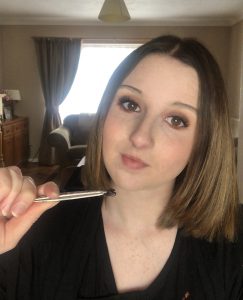
With us all being stuck in isolation at the minute, a lot of us are struggling to find activities to do to fill the time. However, have you ever thought about turning yourself into a Disney Princess? Well, I certainly have so I decided to take you guys through how I transformed myself into Snow White using makeup. This step by step guide will show you how to achieve the look shown above, including the products and techniques I used.
*DISCLAIMER: I am not a professional make up artist, I just enjoy experimenting with makeup and have been practising for a few years. All these steps can be adjusted to suit you however you like. Makeup has no rules so just have fun! :)*

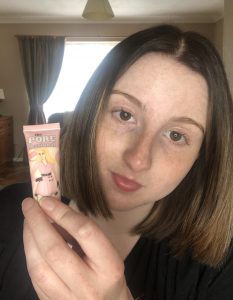
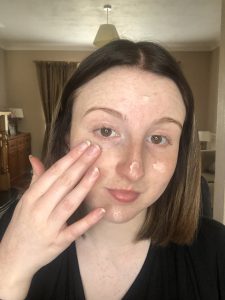
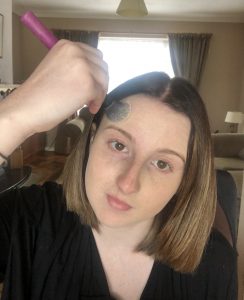
Step 1: Before you start, make sure your skin is cleansed and moisturised. I’m currently using the Simple Kind to Skin Day Cream. Next, I use my Benefit The POREfessional Pearl Primer and massage it in using my fingertips.

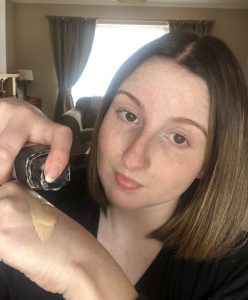
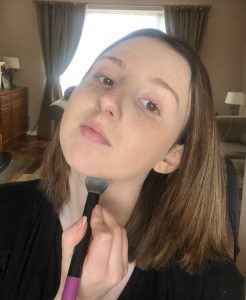
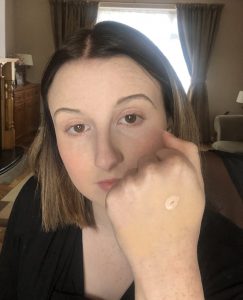
Step 2: After that, I use my L’Oreal Paris Infallible 24HR Freshwear Foundation (mine’s in the shade Porcelain) with my real techniques brush (I’ve searched the whole internet but I can’t find the name of this brush if anyone knows please leave it in the comments). I use one pump on the back of my hand, dip my brush in and blend the product into my skin using circular motions. Remember to blend it under the chin as well.

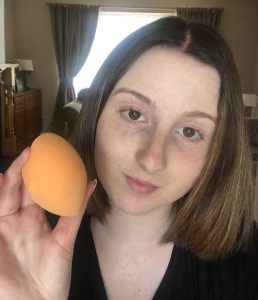
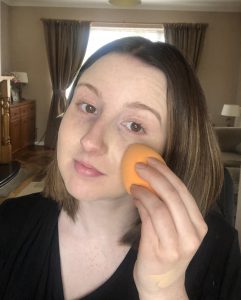
Step 3: To ensure the foundation is blended into the skin nicely, I gently pat my Real Techniques Miracle Complexion Sponge around the face.
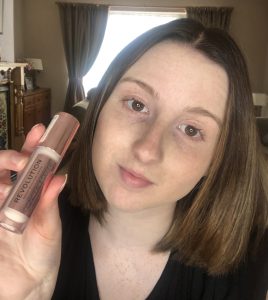
Step 4: Next, I use my Makeup Revolution Conceal And Define Concealer (mine’s in the shade C0.5) and place it under the eyes, on my forehead, on my chin and on the tip of my nose to brighten those areas and around the bottom of my nose to reduce the redness there. I blend that in using one of these really cute Real Techniques Mini Miracle Complexion Sponges.
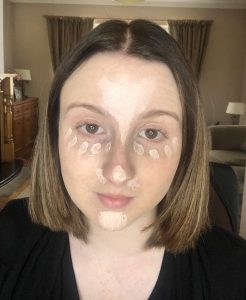
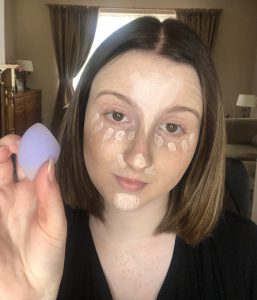

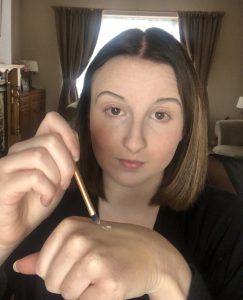
Step 5: This bit may seem a bit weird at first and I know I look crazy but just trust me. I took the concealer and placed it on top of my eyebrows and blended it in using the Miracle Complexion Sponge.

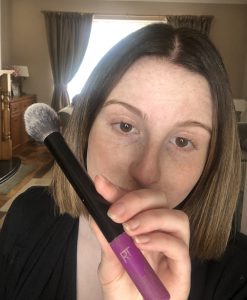
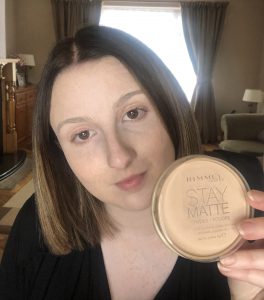
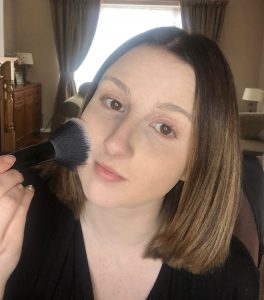
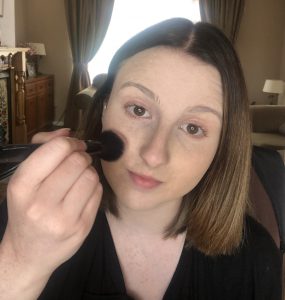
Step 6: Time to set it all in place. I’m using the Rimmel Stay Matte Pressed Powder in shade 003 Peach Glow with a large fluffy powder brush, this one is from Avon. Instead of sweeping the brush over the skin, I gently press the brush into my face. This technique will not move the foundation and concealer and will leave a flawless matte finish. I also make sure to go over the eyebrows as well.
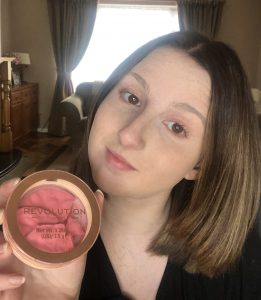
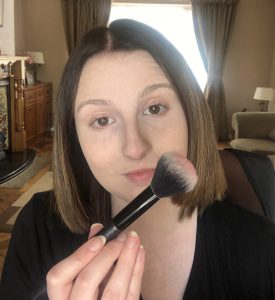
Step 7: Snow White has quite a strong pink blush so to mimic this, I use the Makeup Revolution Blusher Reloader in the shade Pink Lady. As you can see, I dropped mine and it broke which I’m really gutted about but it still works fine. I took this on a smaller fluffy brush from Avon and swept it in circular motions starting from the apple of my cheek and then moving it along my cheekbone. Don’t be afraid to use a lot of this product if you’re looking to accurately mimic Snow White’s look. You may think you look like a clown at first but it will all come together in the end. I actually decided to put some more blush on later in the tutorial as I didn’t put enough on in the step.

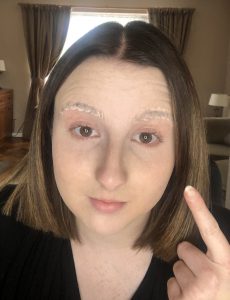
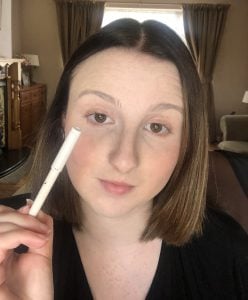
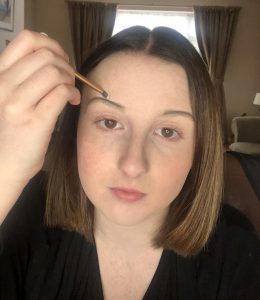
Step 8: Next I used a white eye pencil (this one is from Rimmel London) and ran it through my eyebrows. I then set it again using the Stay Matte Powder and the Mini Miracle Complexion Sponge. This technique is to ensure that my natural eyebrows are as covered as they can be for the next step.
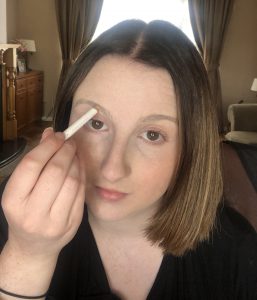
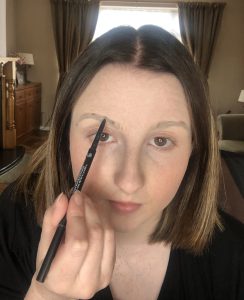
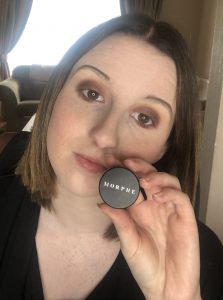
Step 9: Eyebrows! Now, this is definitely not how I would do my eyebrows normally but this is a really good way to get those thin curved eyebrows that Snow White has. Start by drawing three dots near the top of your natural eyebrow, one where you would like the eyebrow to start, the second where you would like the curve to be and the last where you would like the tail to end. To do this I’m using the Morphe Micro Brow Pencil in the shade Mocha. Connect the dots by drawing a thin line using your pencil.
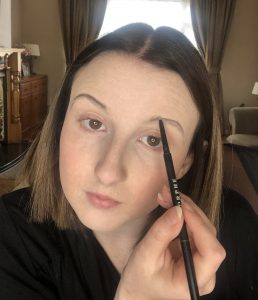
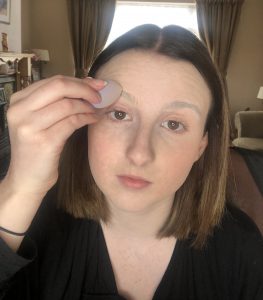
Step 10: I cleaned up any mistakes by taking a bit of the Conceal And Define Concealer on the back of my hand and using a Real Techniques Detailer Brush to dip in the concealer and slowly run over the top of the brow.
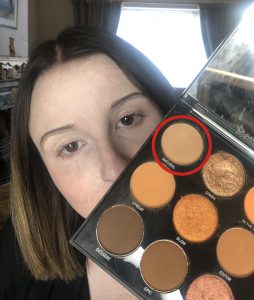
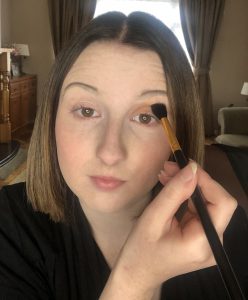
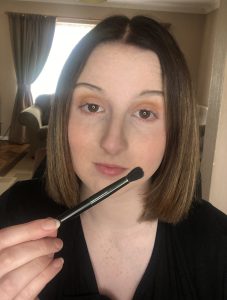
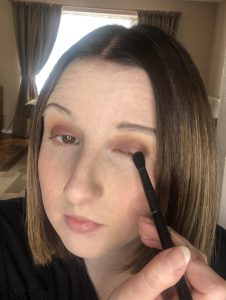
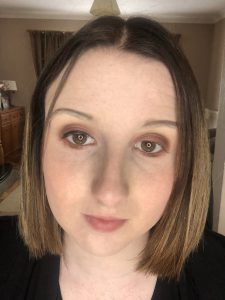
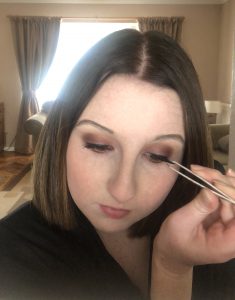
Step 11: Now onto eyes! I start by taking natural in the Morphe 15D Day Slayer Palette as a transition colour to go in the crease of the eyelid. I apply this using a soft back and forth motion with my BH Cosmetics 101 Blending Brush. As Snow White has rounded eyes, I ensure not to brush the colour out any further than where my eye ends and to focus it mainly in the centre of the crease. This will give the illusion of a more rounded eye.

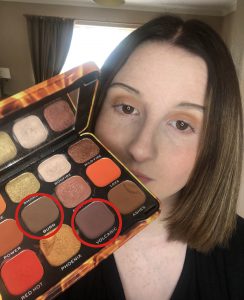
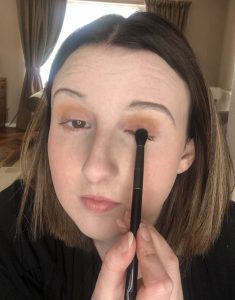
Step 12: Next, I’m taking my Makeup Revolution Forever Flawless Fire Palette and dipping a smaller blending brush into the colour Volcanic. I then sweep this colour back and forth on the lid. Then, I take the colour Burn on the same brush and focus that colour on the outer third of the eye, ensuring I blend the colours toward the centre of the eyelid to enhance that rounded shape.

Step 13: Taking the BH cosmetics 105 Pencil Brush and the shade Burn, I blend the colour in the centre under my eye.

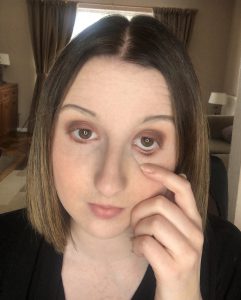
Step 14: If you are uncomfortable with applying eyeliner to your waterline then you can skip this step. Start by using your index finger to gently pull down on the skin just below your eye. Take a sharpened, clean brown eye pencil (This is the LA Girl Eyeliner In the shade Medium Brown) and run it calmly along the waterline. P.S. I apologise for how strange I look in these pictures

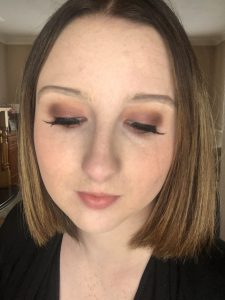
Step 15: Next, I line the upper lash line using my Morphe Gel Liner in the shade Jet. I personally prefer using gel eyeliners for this step but if you prefer liquid or felt tip, then that’s absolutely fine. I take a bit on my Real Techniques Definer Brush and apply it by looking down in my mirror. I’ve made the liner in the centre of the lash line a little bit thicker than on the edges to compliment the rounded eye shape we’re trying to achieve.
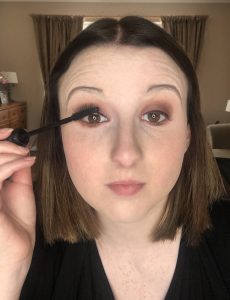
Step 16: Then, I’m using my favourite mascara the Benefit Bad Gal Bang on my upper eyelashes. Don’t apply any mascara to the bottom lashes. If you don’t want to wear false eyelashes then you can leave the eye makeup here and move onto step 18.

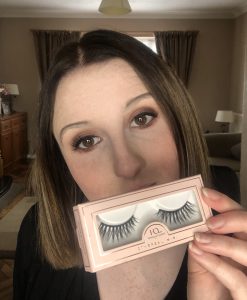
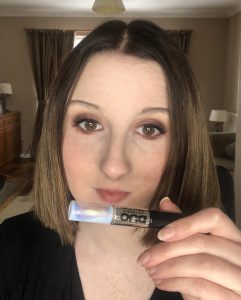
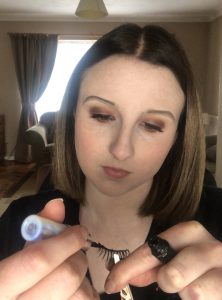
Step 17: For false eyelashes, I chose the House Of Lashes Etheral Mini set. These natural-looking eyelashes are perfect for this pretty princess look. I use these with my Duo 2 in 1 Brush On Striplash Adhesive. Before you apply, ensure the eyelashes are trimmed to fit your eye size. Always trim from the outer corner of the lash. Then, hold your lashes with a pair of tweezers and run a layer of lash glue along the strip of the lash. Wait 30 seconds for the glue to dry up a bit and go tacky (you can shake the lash or blow on the glue if you are impatient like me). Look down into your mirror and gently place the lash as close to the lash line as you can. Make sure you push the inner and outer corners into place. Repeat on the other eye.
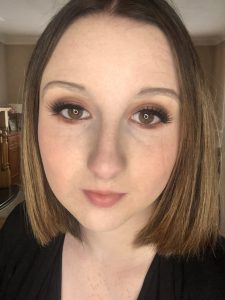
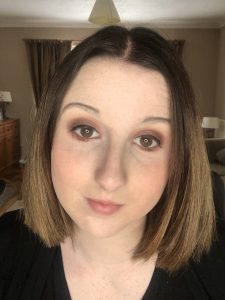
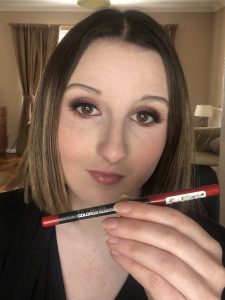
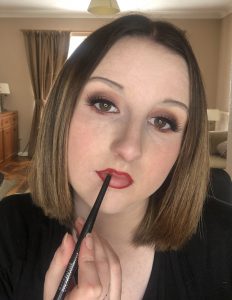
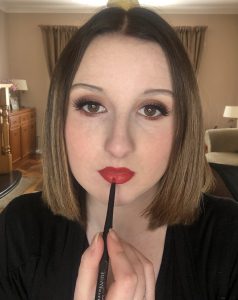
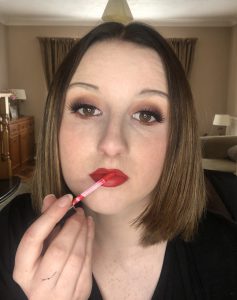
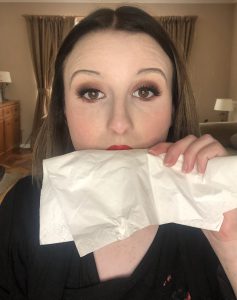
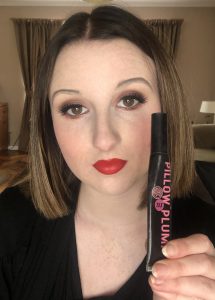
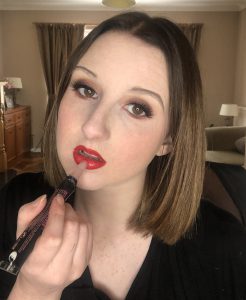
Step 18: Now for one of the most important steps in any Snow White look, the red lip! Firstly, I take the Maybelline Colour Sensational lip liner in Brick Red and line my lips in a similar shape to Snow White’s. I then use the lipliner to fill in the rest of the lip. I then take the Makeup Revolution Creme Lip in the shade Destiny 133 and run it over the top of the lip liner. Taking a tissue, I blot the lips to ensure I don’t get lipstick on my teeth. To finish the look, I take my Soap And Glory Sexy Mother Pucker Pillow Plump XXL Lip Gloss over the top of the red lip.

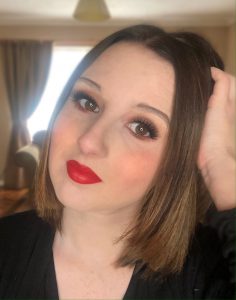
Grab a wig and a dress and there you go! You’ve transformed into Snow White 

Complete your look and with this and more Disney & Snow White merch! Check it out here.

Chloe Berrell
Categories: special Chloe Berrell
Tags: EMP Fashion disney Disney Princess fashion Makeup Snow White Snow White Makeup Tutorial | permalink